
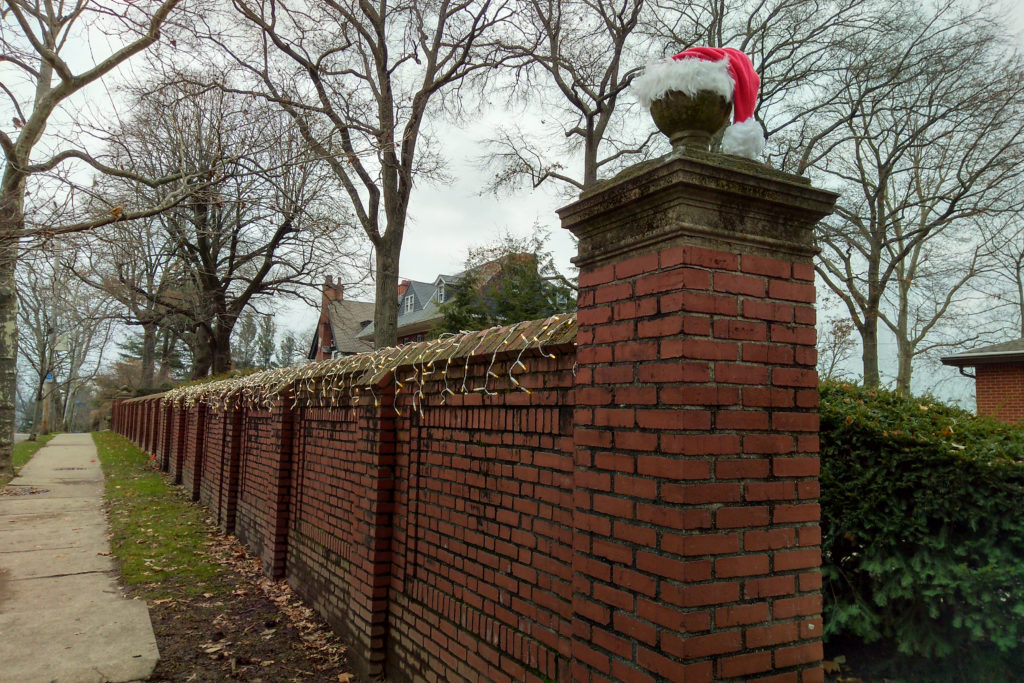
bookmark_borderHappily Hodilays


One of the reasons I wrote and ran my own blog scripts for so long is that WordPress is really way too complex. It’s difficult to understand how to achieve the effects you’re looking for, and it hides so much stuff behind PHP and CSS. All your content is in a database someplace, and I don’t know how to insert or extract stuff sideways like I wanted to do.
For this new incarnation of my blog, I decided to just go with WordPress, and work on learning all the stuffs. It took me a while yesterday to find a WordPress Theme that was simple enough to start with (“Noto Simple”), and then most of the rest of the day to bash on it until it looks like I want it to look.
I removed the silly boxes from around the posts to give myself a little more room for content, took the navigation menus out of the header, figured out how to get those tails at the bottom of each post, fiddled with the margins, and here we are.
I also manged to deactivate the weird composition plug-ins my hosting provider helpfully included in my installation, which makes creating posts in the browser much less annoying.

I have spent the last two days:
This is a project I started way before I got the blog going gain, but I finally added one of the final details to make this project complete. This is a “hitsu“, a Japanese storage box. They’re often used to store armor (which would make them a “gusoku hitsu” or “gusoku bitsu”), and often when you see a set of Japanese armor on display, the armor stand is sitting on top of the storage hitsu. They often have bail handles so a pair of people can carry one or multiple hitsu slung from a pole, and sometimes they have carry straps so a single person could carry the hitsu on their back.
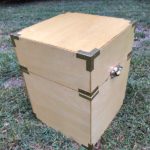


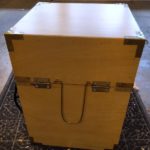
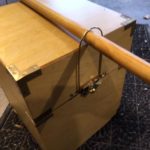
The body of the box is thin plywood to keep the weight down. It’s framed in on the inside with 1×1 lumber, to give the nails something to bite into. The corners are also reinforced with brass hardware that I made myself by cutting it from sheet brass with snips. the latch is a sash lock, which isn’t the best, but it looks ok and is beefy enough to keep the hitsu closed during carrying.
All the wood is protected on the outside by spar urethane, so I think this will be good for carrying things around on drizzly days at Pennsic. that’s the main reason for this project, carrying things around at Pennsic.
I managed to get all the joinery and tuning done on Friday, making this project complete. Here is the complete “Breakdown Bench”.
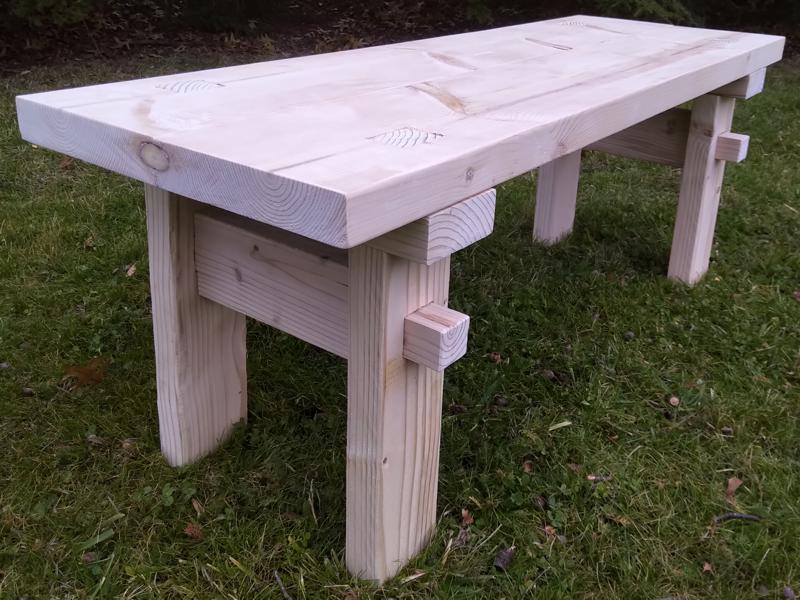
It’s pretty solid, given how tight some of the joinery came out. It still comes apart, though. I need to sand some of these pieces a bit, and maybe add some sealer, but otherwise, it’s done.
I wound up cutting the mortises on the benchtop pieces by drilling through and then cutting with a jig saw. This gave me the basic through- holes, then I tuned them with a rasp and a file.
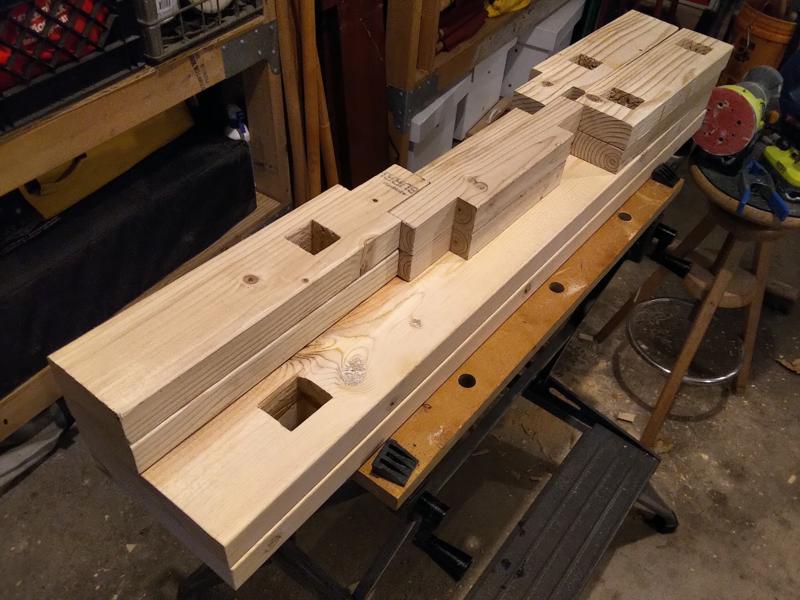
I got started on this new bench project yesterday, and managed to make some real progress. Here is one complete set of legs for the breakdown bench.

I have the other leg assembly mostly done, but one of my support beams broke apart, and I had to start over on it.
Even with the band saw for cutting tenons and the mortising machine, this kind of joinery is time-consuming work. Cutting the mortises in the benchtop pieces might be done some other way.
When we were recently in Japan, we visited the Costume Museum in Kyoto. There are only a few costumes on display in the costume museum these days. Now it is mostly a large dollhouse model of scenes from the Tale of Genji. Part of one of these scenes was this great little bench.
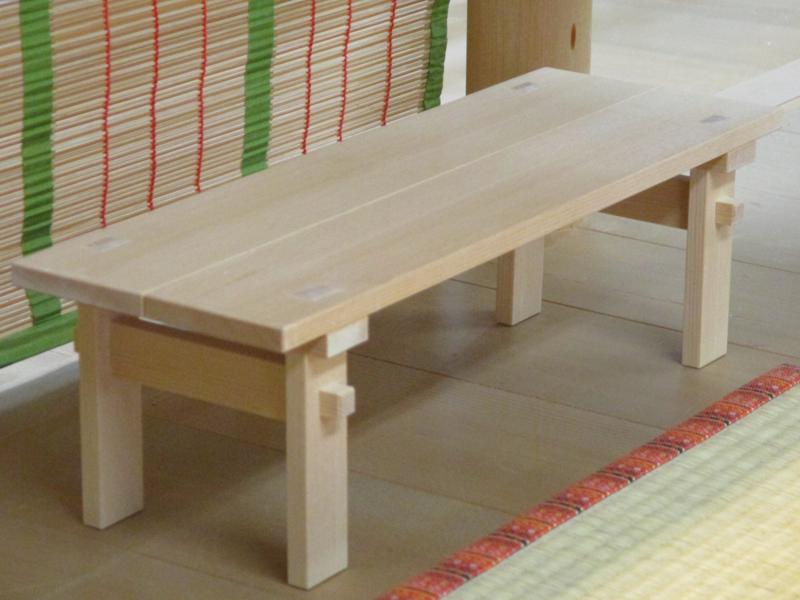
So of course I decided that I need to make a bench just like this. The “no hardware” aspects of it really appeal to me, and even though it may turn out a bit unstable due to that, the ability to break it down into pieces for travel may come in handy. Also, since so many of these pieces have the approximate proportions of modern dimensional lumber, it shouldn’t be too hard to make.
Needless to say, it’s quite a bit of work to go from a photo of a scale model to a plan for cutting and joining actual lumber, but assumptions about scale, combined with measurements of actual lumber, can be used to make decisions, and create plans.
It’s not all fun and games here at the Booth/Evans household. Sometimes you have to do something boring and stupid like recaulk the tub.
The first step is to remove the old caulk. This reveals the secret of why the caulk is failing after only three years. The people who redid the bathroom skipped this step and just smeared new caulk over the existing dried-out old caulk. As part of the renovations, they also coated the ugly old tile with a white epoxy coating. This was also applied over the old caulk, and then caulked over to hide the fact. At least that’s a seal, but I had to be careful not to damage the epoxy coating when removing the caulk.
Anyway, here are the tools and supplies I used, lined up on the workbench.

From right to left: A set of steel scraping tools that are very useful for removing hardened old caulk. Scrape-Rite plastic razor blades for removing softer caulk. A rubber squeegee for shaping the caulk bead once it has been applied. A utility knife for opening the tube of caulk. A small “squeeze by hand” tube of caulk, which costs almost as much as a full tube, but is just enough caulk for this task and needs no gun. A paint brush for sweeping away residue. A protective glove for keeping chemicals off my skin. A cotton rag and ultra-fine scrubby pad. A can of denatured alcohol for cleaning surfaces.
The set of scraping tools is probably the best and most useful thing I have ever bought at Harbor Freight. Thank heavens for the plastic razor blades. They are just hard enough to slice through silicone caulk, but soft enouch not to scratch the epoxy coating.