bookmark_border“Smallest” Cypress Karabitsu Project

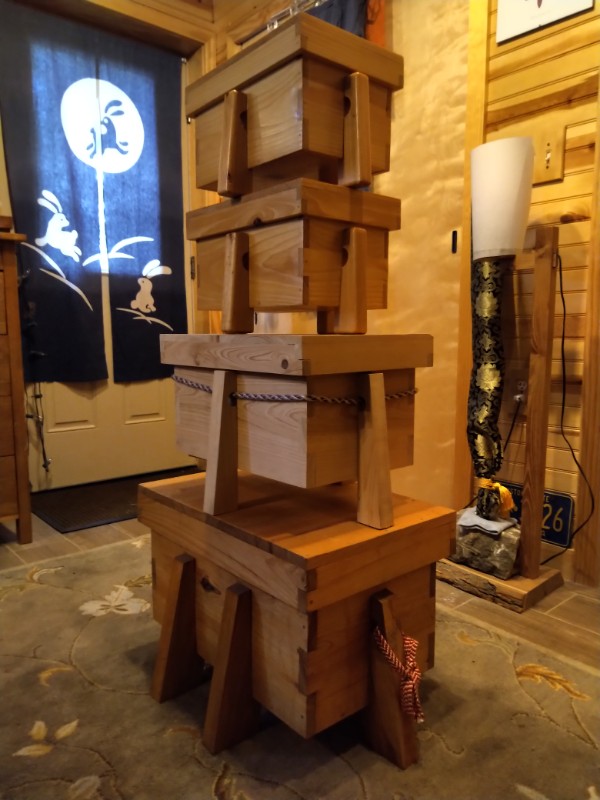
Way back in 2012, I made a regular size karabitsu entirely by hand from cypress 1×12. I developed a set of ratios that enabled me to design a karabitsu based on the width of the wood. The length of the lid is twice the width of the wood, and so on down. Later, I made a small karabitsu out of cypress 1×10, using the same ratios. I decided to make a pair of even smaller karabitsu out of cypress 1×8, planing the wood down to half-inch thickness because I had purchased a planer. I cut all the pieces to length, and started cutting the joinery, but then life intervened. The pieces sat in a box next to my workbench for at least a year. Then we moved. Then the peces sat in a box on my workbench for four years. It was time to complete this project and get these dang things off my workbench.

I cut all the joinery by hand, but I quickly gave up on doing everything by hand. I used a band saw to cut the legs, a router to shape the legs, a sander to smooth out the boxes, and a drill to make holes for the pegs that secure everything. I did decide to use rice paste to assemble the boxes instead of using modern wood glue. I used more hand-mixed blonde shellac for the finish, and now finally these are done.

Two Small Cypress Karabitsu

Here’s an image showing all four karabitsu stacked up, so you can compare sizes:

Four Cypress Karabitsu

I don’t know quite what use I had in mind for these when I started them. They might be useful for carrying one person’s worth of fest gear or something. I’ll have to make some braids for them. At least with two of them, they can balance at either ends of a carrying pole.

bookmark_borderAttack of the Clamps

Making a couple of small karabitsu footed chests, and reached the stage of gluing the body of the chest together.

That’s a dozen clamps

It’s quite possible that if I was just better at cutting joinery, I woould not need quite so many clamps. Also, I’m using rice paste and not carpenter’s wood glue, so it takes hours and hours to dry fully.

Once the paste is dry, I can use pegs to fasten all the joinery, which includes securing the floor of the chest. This is the second of two karabitsu, so later this week I will be able to move on to the sanding phase.

bookmark_borderTwo-by-Phonerest

A while back, and I can’t really remember how long ago this was, I was working in the shop and wanted a place to rest my phone where I could still see the screen. I guess I had the table saw set up because it mostly consisted of a dado cut into a piece of scrap 2×4. That piece of 2×4 was mostly likely an off-cut from when I shortened my workbench. Anyway, I’ve been using that phone rest ever since. the cut down the center enables you to charge the phone while it is in the rest, provided the rest is hanging off the edge of a surface. I eventually added some foam because the slot was too wide. More recently, I cut the bevel on the back edge so that the phone camera can’t see the rest.

The Mark 01 Phone Rest

This rest is still a great accessory in the shop, since it doesn’t really matter what happens to it, or if it gets damaged. I think the screw hole in the top is part of the original piece of scrap. This stand didn’t really look very nice in my office, though. Hence, the new one I just made from slightly nicer lumber, using the same design.

The Mark 02 Phone Rest

This one is made from some left-over cypress from the camp gate project. Yes, I still have lumber left over from that project. I think this one is much cleaner and refined. There’s a bit of boiled linseed oil on there to make the color pop.

I must have seen this design someplace. I can’t imagine that I came up with it myself. It’s just too simple and elegant. I might make a Mark 03 version from some ipe that Mr. Arimoto gave me.