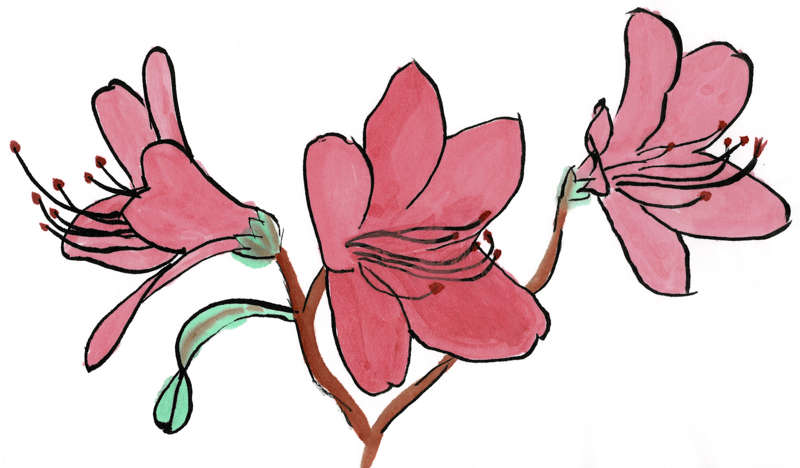
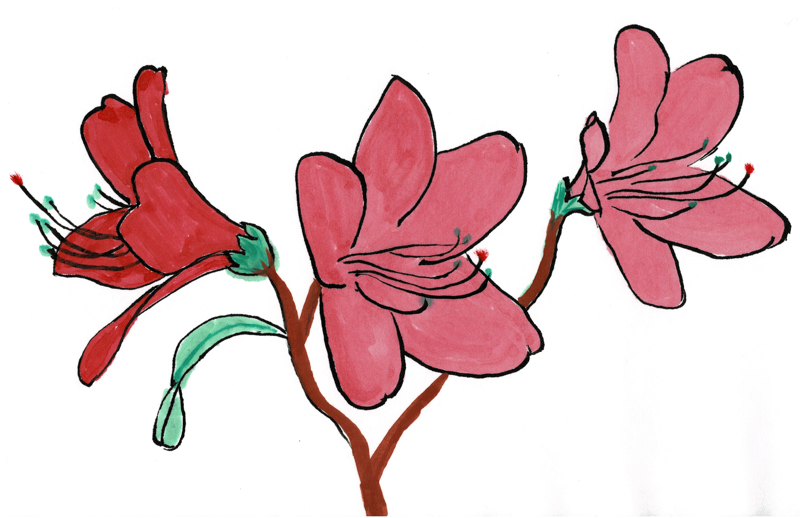
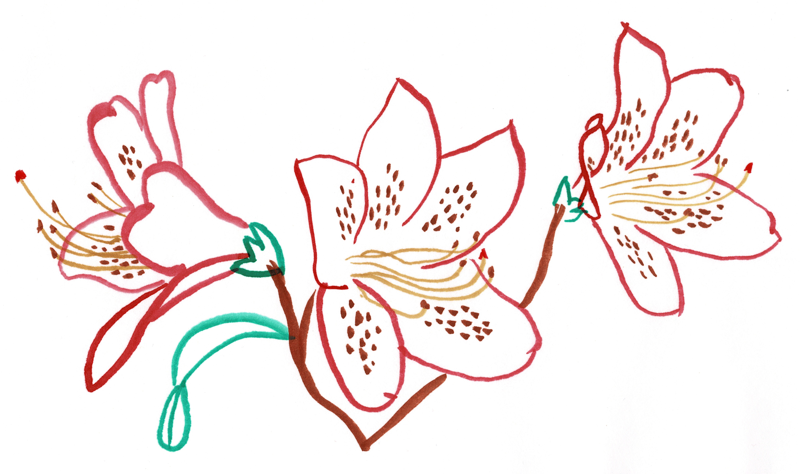
I was recently inspired to start painting SCA scroll blanks again, like I did (gulp!) six years ago. My first recent efforts were these, traced from a photo I took of some Azalea blooms in Sharon’s garden.
Original images are all about 8.5″x5.5″ in size. These are all done with Sumi ink and watercolors on 9″x12″ hosho paper. I’m still in love with my “Kolinsky small” brush from Kuretake. Preserve the kolinsky!
The third picture is probably the least “medieval Japanese” of all these, but I think it’s the most attractive. It is difficult to get good shading and depth in watercolor, and I’m just not good enough yet. The outline form is a little easier to achieve.
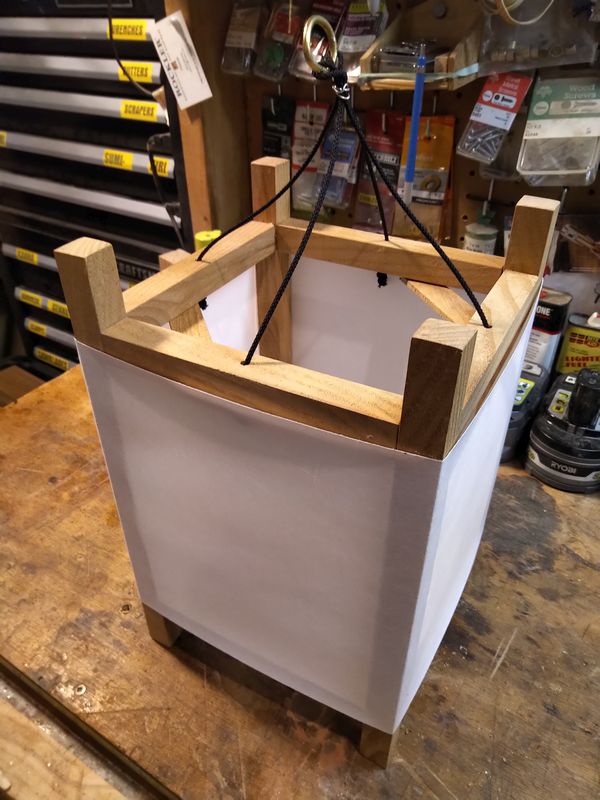
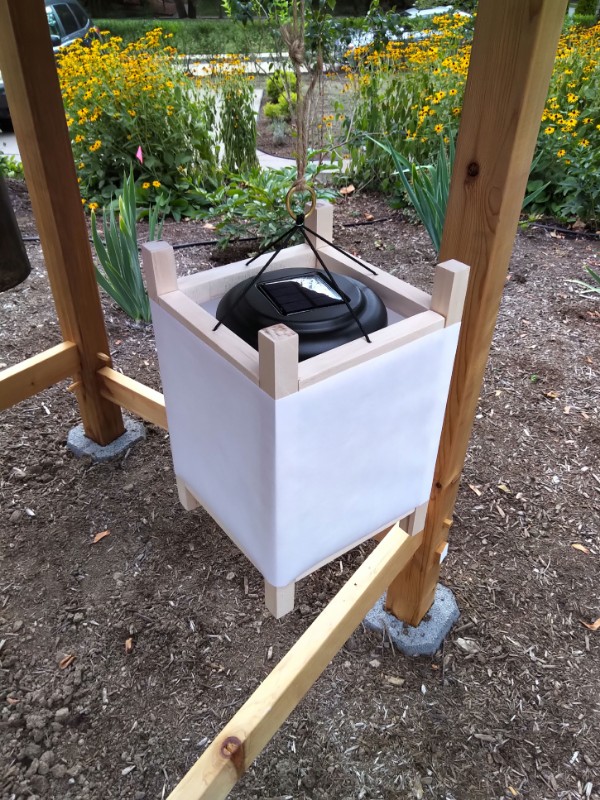
I just completed another lantern for the “six lanterns” project. The frame of this one is made out of mulberry wood. I had a small plank of this that Mr. Arimoto gave to me probably about seven years ago, and it seemed like a good project to use it on.
Andon in Mulberry
Of course, with the paper on it like that, you can barely see any of the wood. The fibers in this plank were very rough and wavy, but in the places where my plane got a good shaving, the surface is super-nice.
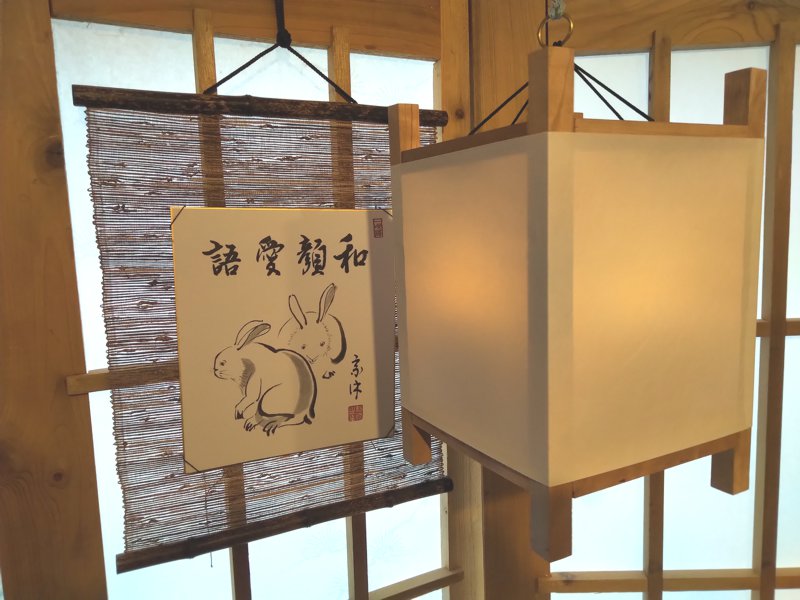
Frame of Mulberry Andon
I rough-milled the sticks from the plank using my band saw, then hand planed them down to 3/4″ square rods. There really wasn’t enough wood in the plank to make it entirely from mulberry. To compensate, I made some of the stretchers a little shorter than normal, and used dowel joinery instead of my usual mortise and tenon joinery. This was a little easier, since it meant cutting short lengths of dowel instead of cutting 16 tenons, but it meant drilling twice as many mortises, half of them into the ends of stretchers. I could not have done it without my drill press.
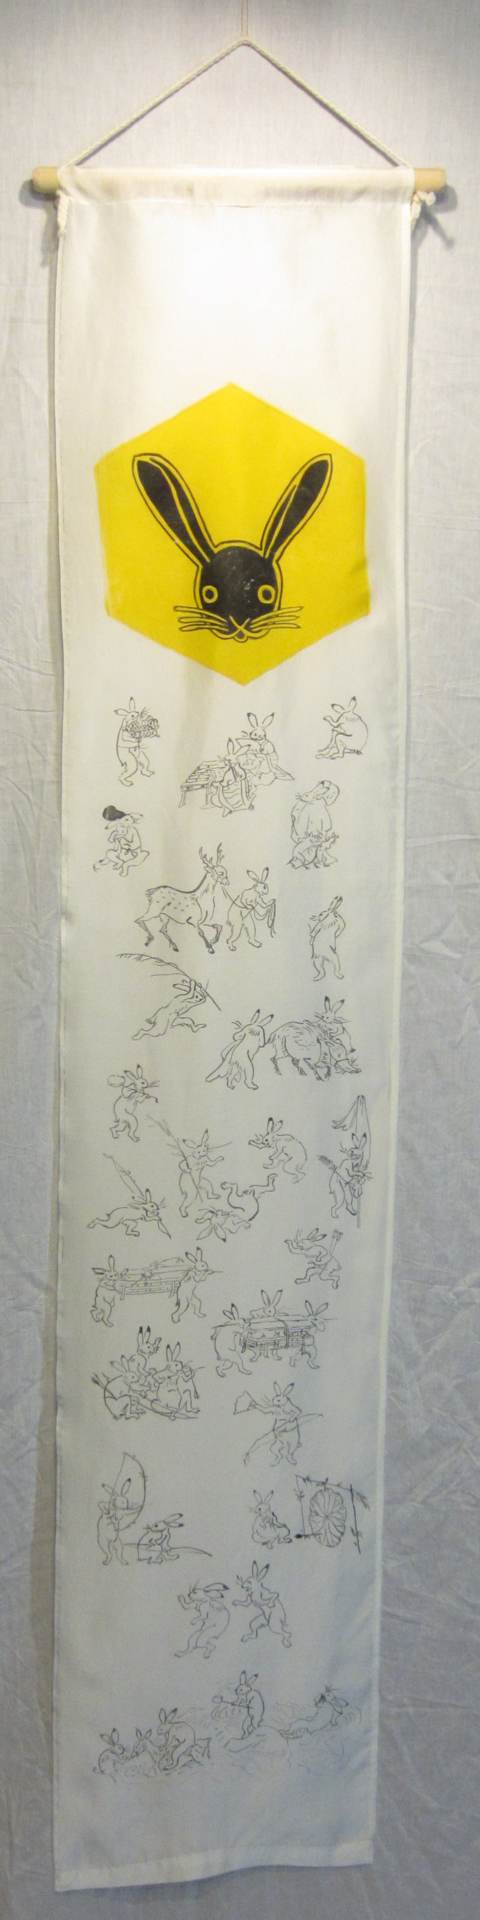
My old shibori-dyed personal banner is getting a little faded, and my silk banner is too delicate to hang outside in the rain, so I decided to make a durable banner that I can mistreat.
Banner in trees
It’s 15 inches wide and 6 feet long of cotton duck fabric in this wonderful deep-yellow color. The black parts of the design are painted on with Jacquard Textile Color, with details on the bunny in gold Jacquard Neopaque fabric paint. The textile color is a really thick pigment type paint, that doesn’t forma film the way the acrylic Neopaque does.
I made a simple 8-strand suspensory braid in some polyester yarn, so that I won’t have to worry about it, either.
I had meant to leave this year’s white kosode half-finished, so I could use it as a demonstrator for a class I was going to teach at Pennsic on kosode construction. Instead of leaving it to fester while we’re waiting to see if there will be a Pennsic next year, I decided to complete it so that I could wear it if we ever happen to have an SCA event ever again.
Gosh that all sounds pessimistic, I know, but there it is. Really, I’m much more optimistic about the future of the SCA than that. I think we will have to reconsider what makes an event and how we run them, but I’m sure we will have events in the future. They might just be very different from the kind of events we’ve had in the past, though.
Anyway, this year’s kosode, in white ramie. I’ve already made two kosode from the white ramie I ordered a couple of years ago. When it became time to make my 2020 kosode, I thought about getting some new fabric, but I realized I still had plenty of this terrific 150 gram ramie linen from Morex Fabrics, so why not use it? The pattern is my standard men’s kosode method, starting from 14.5″ panels. For my technically-minded friends, I continue to use half-panel overlaps and three-layer collars.
I would have tried to get these done before Pennsic, but since Pennsic was cancelled for this year due to nobody wanting to share a campground with 10,000 other people from all over the world, I procrastinated.
10 Debatable Lands belt favors
These were all machine embroidered onto some nice heavy golden yellow cotton duck fabric, and display the Baronial comet along with “Salve Accolens” (“Hello Neighbor”), the Baronial motto. Each is about six inches wide, and 18 inches long (they are doubled over in the photo). You can see I tried out a couple of different typefaces before deciding on this classy French Script, and if you look closely you can also see that I tried out some of the dozens of decorative top-stitching patterns that are available on my sewing machine but that I almost never use.
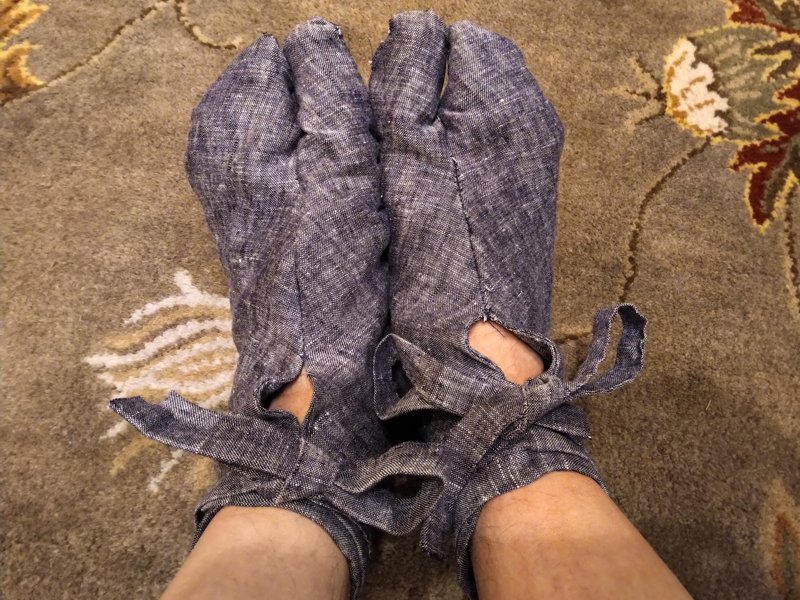
It’s not even half-way through the year, and I already have this year’s tabi foot coverings finished.
Tabi in blue linen
For those of my readers who are not familiar with this tradition, I started sewing my own tabi a few years ago to go with my Japanese garb. They are usually made from leftover fabric from garb projects, but it’s just regular fabric, so they tend to wear out pretty quickly. I found that if I make a pair a year, I can keep ahead of the curve and always have at least a few pairs of tabi that are not worn out and shabby looking. Usually, I wind up finishing a year’s tabi in January or February of the following year. Not this year! Free time and your wife hosting local sewing circles can do that.
These are made from the blue linen I used for the hippari top I made for the field clothing outfit from this past December. They’re sewn entirely by hand, including attaching the himo ties, which I normally do by machine. This was not a decision to be a stickler about it, just that I was sewing these to have some sewing to do while being social, so why not stretch it out a little bit?
These are apparently the eleventh or twelfth pair of tabi I have made for myself. Scary. Maybe the next pair will be impractically fancy. We still have some really nice silk brocade sitting around.
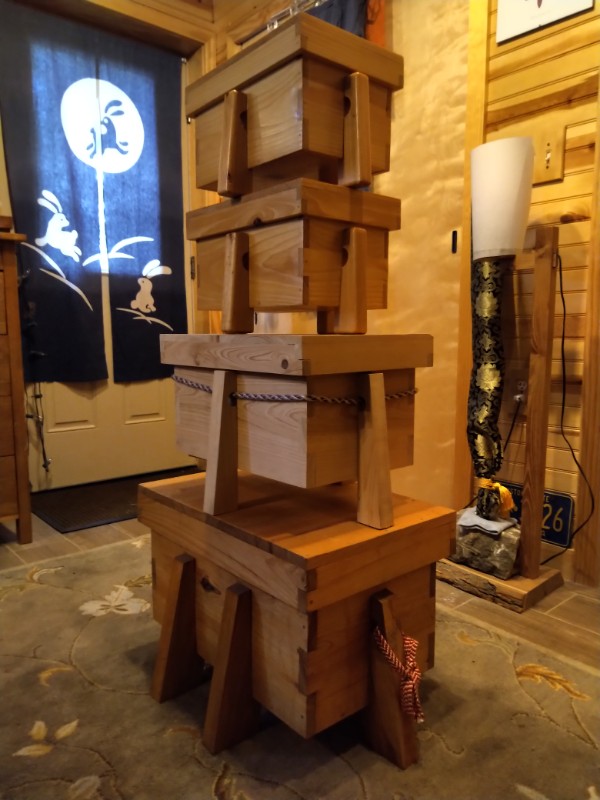
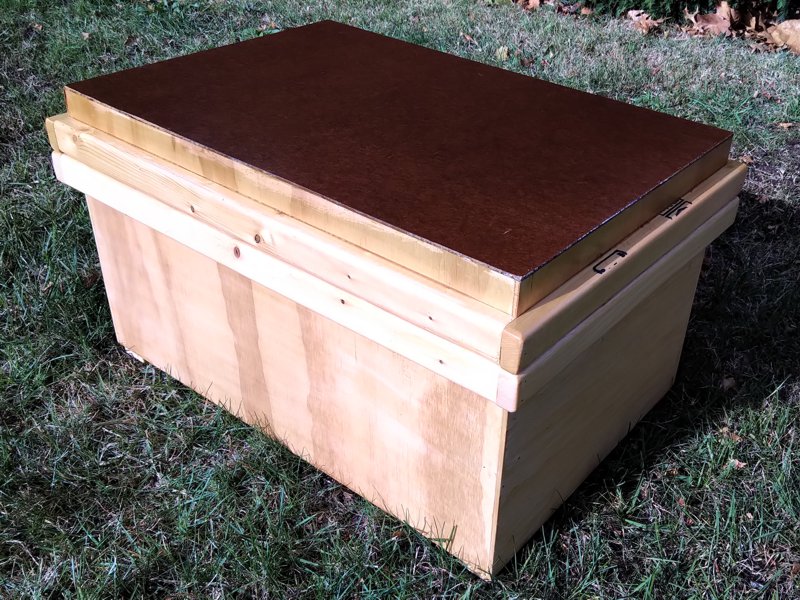
Way back in 2012, I made a regular size karabitsu entirely by hand from cypress 1×12. I developed a set of ratios that enabled me to design a karabitsu based on the width of the wood. The length of the lid is twice the width of the wood, and so on down. Later, I made a small karabitsu out of cypress 1×10, using the same ratios. I decided to make a pair of even smaller karabitsu out of cypress 1×8, planing the wood down to half-inch thickness because I had purchased a planer. I cut all the pieces to length, and started cutting the joinery, but then life intervened. The pieces sat in a box next to my workbench for at least a year. Then we moved. Then the peces sat in a box on my workbench for four years. It was time to complete this project and get these dang things off my workbench.
I cut all the joinery by hand, but I quickly gave up on doing everything by hand. I used a band saw to cut the legs, a router to shape the legs, a sander to smooth out the boxes, and a drill to make holes for the pegs that secure everything. I did decide to use rice paste to assemble the boxes instead of using modern wood glue. I used more hand-mixed blonde shellac for the finish, and now finally these are done.
Two Small Cypress Karabitsu
Here’s an image showing all four karabitsu stacked up, so you can compare sizes:
Four Cypress Karabitsu
I don’t know quite what use I had in mind for these when I started them. They might be useful for carrying one person’s worth of fest gear or something. I’ll have to make some braids for them. At least with two of them, they can balance at either ends of a carrying pole.
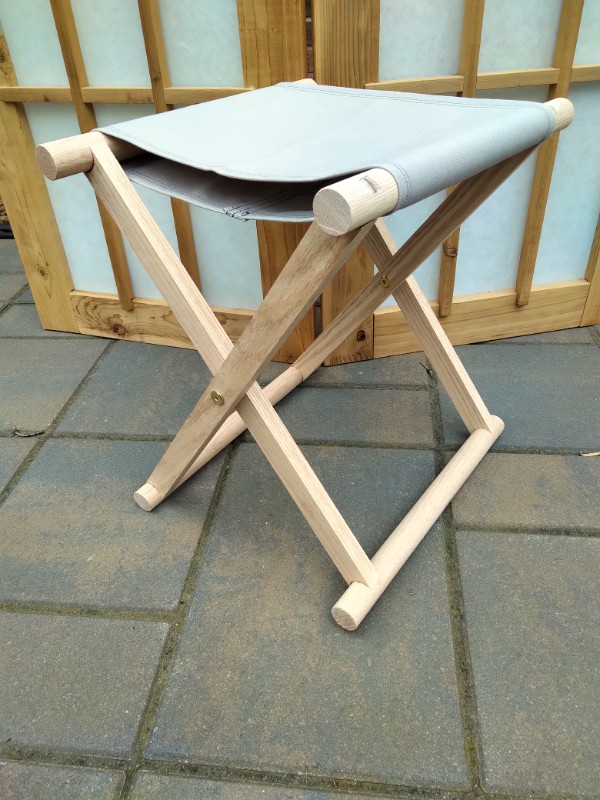
Last Pennsic, a friend asked me if I could make a shogi for her like the ones I have made for us. I said yes, because I had some things I wanted to try. I tried out a new method for the leg joinery, and a new method for sewing the seat fabric, earlier this year. I bought some new hinge hardware back before the virus shutdown, so it was time to get cracking. I started in earnest a few days ago, and I finished it up today.
Shogi #6, for Caellin
Now, if we ever have another SCA event, this stool is ready. If you zoom in on the picture, you can see that I used the same wedged through-tenons with curved shoulders that I used on the previous shogi. The only real difference is that I bought some connector bolts to use as the pivot hinges where the legs cross. There is also a bronze bushing in there to make sure the hinge works smoothly. All this special hardware was a little pricey, but I think it will be worth it in the long run, and even thought the hexagonal recesses in the bolt heads look a little modern, I think the hardware gives the completed stool a much more finished look.
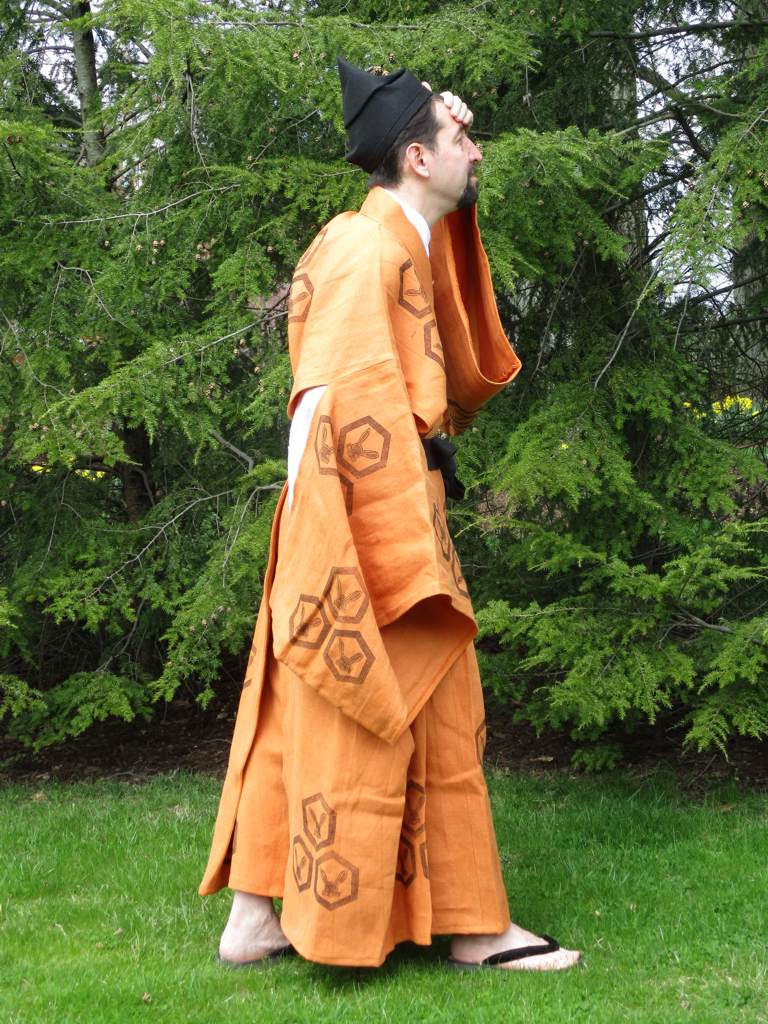
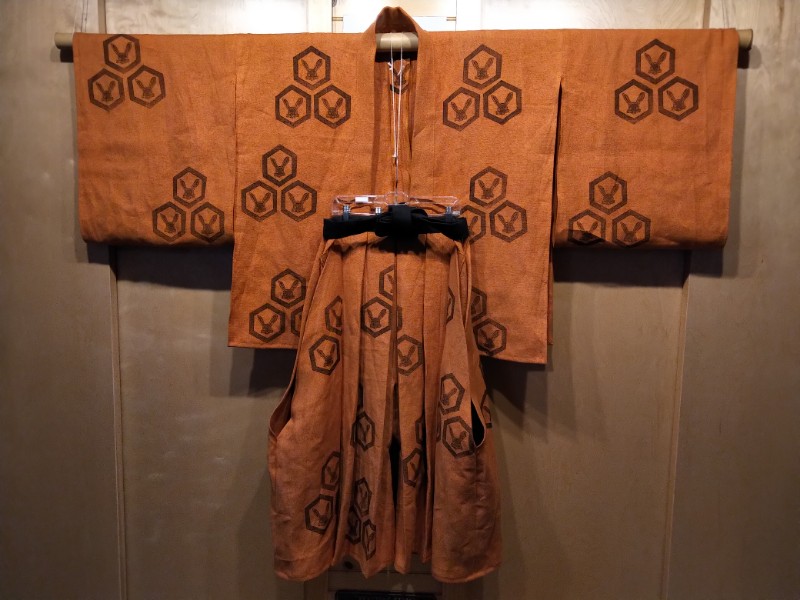
Kingdom coronation was held virtually this weekend, so we got dressed up at home for the teleconference. Here’s a comparison of the gentleman in the “Nenbutsu Gathering” scroll with me in my daimon hitatare.
A while back (more than a year ago, probably) I was browsing the online collections of the Metropolitan Museum of art, and I found a hanging scroll called “A Nenbutsu Gathering at Ichiya, Kyoto“, which is an excerpt from the “Illustrated Biography of the Monk Ippen and His Disciple Ta’a”.
Now, I am not a big fan of the Pure Land Buddhism favored by Ippen, but I was instantly drawn to a figure in the middle foreground. Not only is he wearing a bright-colored hitatare, it’s a daimon hitatare decorated with a triple-hexagon motif (my registered badge is hexagonal), and I look kind of like him with a beard and narrow stature.
This has been the reason for me buying bright orange linen at Pennsic, me learning to carve wooden printing blocks, and me spending hours practicing printing and actually printing yards and yards of fabric.
Behold, my daimon hitatare:
Hitatare top and matching hakama pants, front
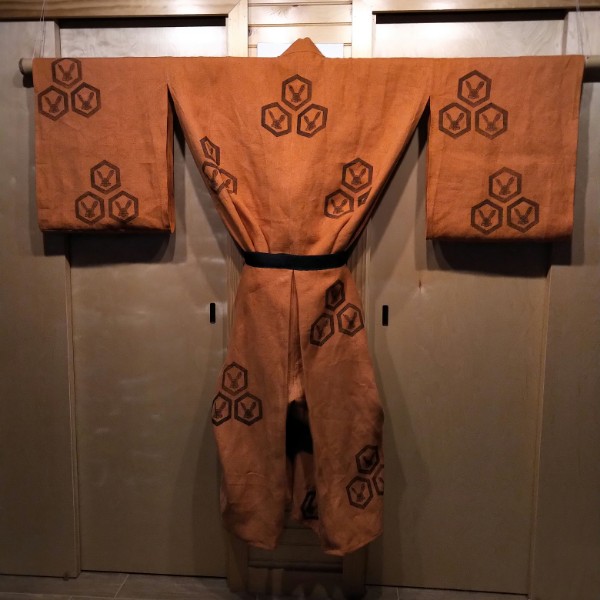
Hitatare top and matching hakama pants, back
The outfit still needs some finishing touches, but I am so happy with the way main construction went on this garment that I thought I would post some photos. I still need to make a samurai eboshi hat, and a fan if I want to complete my recreation of this guy from the painting. I am torn about adding the kotsuyu and sodetsuyu knots to the garment. I know they should be there to make a proper daimon hitatare, but they are not visible in the painting.


