More Wooden Pieces
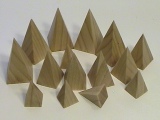
I Can't Stop
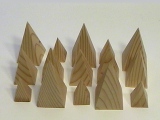
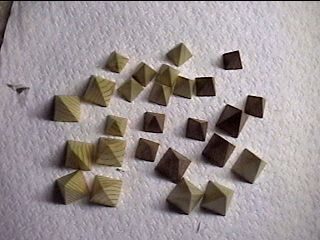
August 2000 & June 2001
August 2000 & June 2001
Ok, look, if you don't know what these are by know, you must be new here. Try reading from the bottom up (on the projects page), as new stuff is added at the top of each section.
Anyway, these are made of wood using a new method that's less time intensive than my previous method.
The sets above are made from:
The poplar and oak both came as 2x2, which I then cut up. The pine was mostly used to verify the setup, and let me warm up before using the nicer wood, but at the end I had a decent stash of pine pieces, so what the heck?
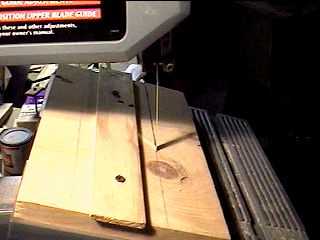
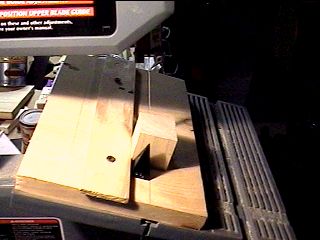
Start with a band saw, and a jig. The table of the band saw is tipped to the angle necessary to cut 2-pointers in this photo. After I set up the band saw, I ran the piece of board in there, and screwed a rail down so that it was 25 32nds of an inch from the saw cut. That's the width of a 2-pointer. You'll need three jigs, one for each size of piece.

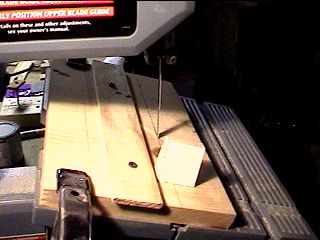
Here's me checking the setup with an injection-molded piece. The piece should slide easily back and forth next to the blade. Don't worry about making your pieces a little large, you can fix that later.
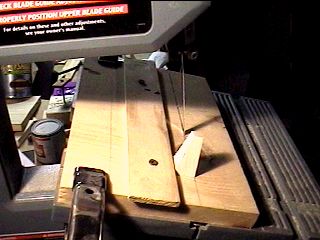
Start with a block of wood that's tall enough for the size piece you're cutting. For 2-pointers, I used pieces cut off of a 2x2 or 2x4. Please the block so that the grain is running perpendicular to the table surface. This yields very attractive pieces since the surfaces of the pyramid will cut diagonally through the grain.
Make sure your jig is clamped securely to the saw table. I almost forgot to do this. That would have been bad. Run the block through the saw, pressing it up against the rail the whole time. Then, rotate the block 90 degrees and do it again.
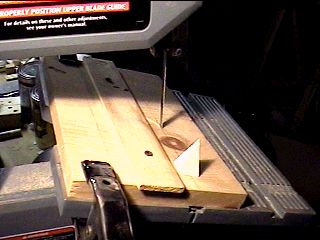
Rotate the block again, and cut the third side of the pyramid. Don't throw away any of that scrap until you're sure you can't get more pieces out of it. I was able to get two 3-pointers out of every piece of 2x2.

Rotate the block one last time and finish cutting the pyramid. Now is a good time to remind you to be careful. Especially with the 1-pointers, your fingers get awfully close to the saw blade.
Now you have a rough pyramid! You should do some rough checking now against a plastic pyramid to make sure your setup isn't totally off. Again, try to make them a littly large as they will get smaller during sanding.
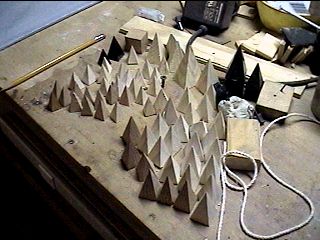
Repeat this process over and over again until you have a workbench full of rough pyramids. Don't forget to make three different sizes. Make a bunch of extras of each size, in case you mess them up, or don't like the grain pattern.
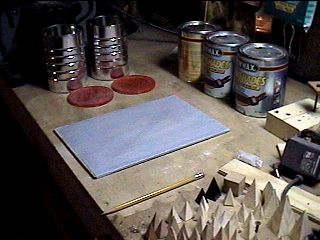
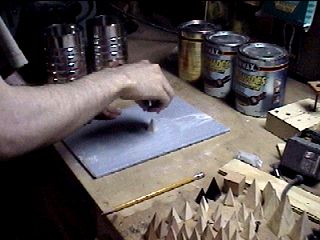
Now, the sanding. I glued a sheet of 400 grit sandpaper down to a piece of smooth plywood with spray-mount. This gave me a nice flat plane to sand the sides of the pyramids.
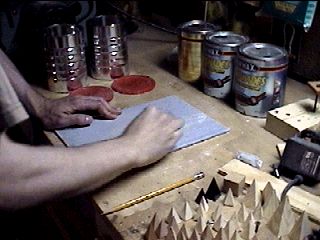
Rub each side of the pyramid against the sandpaper until it is smooth. You don't need a lot of pressure, but you might need a lot of repetition. If you're going through sheets of sandpaper very rapidly, you're pressing too hard.
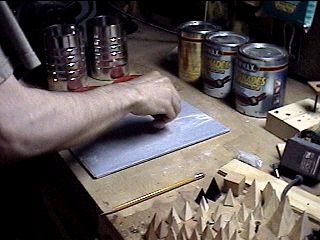
Sand the base of the pyramid, too. Be careful here, because the pieces like to tip over. The sound is something like nails on the chalkboard.
See how I was holding the pyramid in that previous photo?
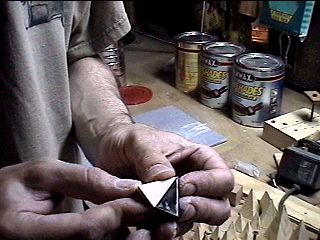
Once the piece is smooth, check it for size against a plastic piece. Check all four sides for compliance.
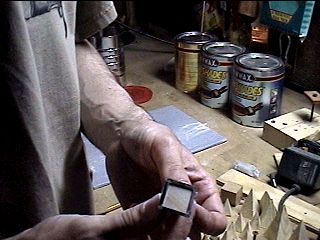
You can check the height of a 1- or 2-pointer by putting it inside the next larger piece. The bottoms should be flush.
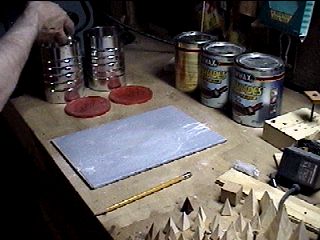
If it's good, put it in the "Good" can. If it's bad, put it in the other can. I still have about half a can of "bad" pieces, if anybody wants them.
The sanding is definitely more work than the cutting. Plan on taking your time and taking a lot of it. Once the pieces are all sanded, they're ready for finishing.
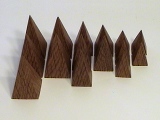
You can use polyurethane if you want, the spray-on stuff works very well. My personal favorite is to soak the pieces in melted paraffin until it soaks into the wood and drives out some of the air. Then, I pull the pieces out and polish them against a piece of paper as the wax cools. Here are some finished pieces.